Transparent file encryption in git

Post thumbnail

I’ve blogged before about Advent of Code and how I’ve been doing it each year since it began in 2015 and wrote a benchmarking tool for it - AoCBench.

A few years ago when I first wrote AoCBench, there was limited formal guidelines from Eric with regards to repo content, specifically, the closest thing to “offical” guidelines for commiting inputs to repos was a couple of social media posts that essentially stated that it was fine, but just don’t go collecting them all:

In general I ask people not to publish their inputs, just to make it harder for someone to try to steal the whole site. The answer is probably fine, but also probably not very interesting since they vary per person.

https://x.com/ericwastl/status/1465805354214830081

I don’t mind having a few of the inputs posted, please don’t go on a quest to collect many or all of the inputs for every puzzle. Doing so makes it that much easier for someone to clone and steal the whole site. I put tons of time and money into Advent of Code, and the many inputs are one way I prevent people from copying the content.

https://www.reddit.com/r/adventofcode/comments/7lesj5/comment/drlt9am/

And also other comments where it wasn’t actively discouraged, but preferred not to.

So AoCBench was designed around all the participants including their own inputs in the repo and this allowed nice things like testing of solutions against different inputs to ensure validity (something you otherwise can’t really do.)

However sometime last year shortly after the start of the month this policy changed (Before / After) and an explicit request was added to the site not to:

If you’re posting a code repository somewhere, please don’t include parts of Advent of Code like the puzzle text or your inputs.

This policy was also codified on the official subreddit and moderators (and other users) started actively (and often aggressively) checking the repos of anyone who posted and insisting they immediately remove any inputs (and purge them from git history) and sometimes resulting in users being banned for not complying. This also hurt a bit with debugging solutions where sometimes different inputs have different properties that may trip some people up.

I don’t want to get too much into any legal technicalities around this and if the inputs are or aren’t copyrightable, or how it has been handled and the negatives around it. I just want to continue enjoying Advent of Code each year with my friends and our benchmarking tool, and if I can respect the request then I’ll do that as well.

For the first year (last year) we continued as-is, but this year people using AoCBench felt stronger about not including inputs in the repos. So how can we do this?

Posted on December 4, 2024 Code Git

Converting LXC Containers to full VMs

Post thumbnail

I have been a long-time user of proxmox for my virtualisation needs, starting back in the days of Proxmox 3 (prior to that I was running Ubuntu with OpenVZ rolled in by hand). Back then I only had a single server and resources were tight, so I deployed a lot of my workloads as OpenVZ containers.

As time went on, proxmox switched to LXC, and I dutifully converted all my containers to LXC and kept on going.

More time went on and I added more servers, and ended up clustering them for ease of management. Then eventually replacing them all with more powerful nodes so now resources were no longer a concern. I also eventually added Ceph into the mix (using proxmox’s built-in support for ceph) and 10G Networking so that I had shared storage for VMs and could the start doing VM migrations between nodes quickly.

But, LXC Conainers have flaws - live migration only works for full-VMs. LXC Containers have to do a reboot to actually move onto and start running on the new node. For some workloads this isn’t really noticable or a problem - but for others this is quite bad.

Also, as more and more of what I run involves Docker, it’s a lot easier/nicer/safer to run these workloads in actual VMs rather than LXC containers.

But installing and configuring full-VMs was a chore. With LXC Containers you could be up and running in minutes by just deploying a template. Full-VMs required a full installation to an empty disk. This could be automated using kickstart/preseeding etc (And I wrote a tool to help manage a pxe-boot environments for this purpose). But over time, this has now become trivial as well - cloud-init is now supported directly within proxmox and all the major OSes provide cloud-init compatible disk images, so getting a fresh VM is a matter of cloning a template, updating some cloud-init settings and starting the VM.

Due to all of this, almost all of the VMs I create these days are full VMs. Anything new - it’s a VM, which gives me all-the-good-stuff™.

But I still have a lot of legacy LXC containers. These all end up suffering any time I do hardware/software maintenance on the host nodes, or if I have any problems that require putting a host into maintenance mode.


It’s time to fix this.


Remote LVM-on-LUKS (via ISCSI) with automatic decrypt on boot

Post thumbnail

I have recently added some iscsi-backed storage to my proxmox-based server environment, primarily as an off-server location to store backup data.

For a multitude of reasons, such as the sensitive nature of the data, the fact that the physical storage lies outside of my control, and just good security hygiene - I wanted to ensure that the data is all encrypted at rest.

I wanted to be able to use this iscsi as a storage target for proxmox allowing me to just add the volumes to VMs allowing HA, and I didn’t want to have to do encryption inside every VM incase I accidentally forgot to enable it for one of the VMs (remember, the storage is hosted external to me so I have no control over the physical access to it) so to do this I have made use of LUKS encryption on the iscsi block device that I am presented with and then I run LVM over the top of this. (LVM-on-LUKS as-opposed to LUKS-on-LVM)

Updated Theme

Post thumbnail

Once again, I have replaced the theme of this blog.

Unlike the previous theme, this one is actually one I mostly ended up designing myself rather than just finding one that I mostly liked and running with it, and given that, I figured I’d talk a little bit about the thoughts behind it and how it came to be and what else I’ve done behind the scenes.

Posted on February 8, 2022 General

Docker Swarm Cluster Improvements

Post thumbnail

This post is part of a series.

  1. Docker Swarm with Ceph for cross-server files
  2. Upgrading Ceph in Docker Swarm
  3. Docker Swarm Cluster Improvements (This Post)

Since my previous posts about running docker-swarm with ceph, I’ve been using this fairly extensively in production and made some changes to the setup that follows on from the previous posts.

Fun with Dell S4048 and ONIE

Post thumbnail

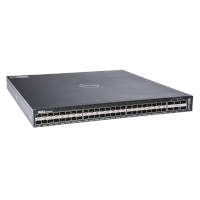
In $DayJob we make use of Dell S4048-ON Switches for 10G Top-of-Rack (ToR) switching and also sometimes 10G Aggregation/Core for smaller deployments. They’re fairly flexible devices with a high number of 10G ports, some 40Gs and they can do L3 ports and L2 ports. You can also run them either Stacked or in VLT mode for redundancy purposes.

In addition these things use ONIE (Open Network Install Environment) and can run different firmware images - though we almost exclusively run these with DNOS 9 which is the Force10 FTOS code that Dell acquired some time ago rather than DNOS 10.

One evening, I was tasked with an “emergency” build request. We had some kit being shipped to a remote PoP the following day and the intended routers were delayed, so we needed to get something quickly and temporarily in place to take a BGP Transit Feed and deliver VRRP to the rest of the kit. A spare S4048 we had lying around would do the job sufficiently for the time period needed. I figured it wouldn’t take too long to get the base config needed and get it ready to be shipped with the rest of the kit.

So I got the Datacenter to rack/cable/console it so that I could begin configuration then set aside some time in the evening to do the work.

As I was watching the switch boot up I noticed something odd. Turns out the last engineer who had used this device had chosen to install the OpenSwitch OPX ONIE firmware on it instead of the usual DNOS9 firmware. So much for my quick and easy config.

At this point, I could have just reloaded the device into the ONIE installer environment and installed DNOS9 and been done with it all. But, I had a fairly open evening, and I’d not yet really played about much with any of the alternative ONIE OSes, so armed with my Yak Sheers, I thought I’d have a look around.

(After all this, I then re-imaged the device onto our standard deployment image of DNOS9 and completed the required config work that I was supposed to be doing.)

Cisco XConnect L2Protocol Handling

Post thumbnail

In $DayJob we make fairly extensive use of MPLS ATOM Pseudowires (XConnects) between our various datacenter locations to enable services in different sites to talk to each other at layer2.

The way I describe this to customers is that in essence these act as a “long cable” from Point-A to Point-B. The customer gets a cable at each side to connect to their kit, but in the middle of it there is magic that routes the packets over our network rather than an actual long-cable. Packets that enter 1 side will be pushed out the other side, and vice-versa. We don’t need to know or care what these packets are, we are just transparently transporting them.

Upgrading Ceph in Docker Swarm

Post thumbnail

This post is part of a series.

  1. Docker Swarm with Ceph for cross-server files
  2. Upgrading Ceph in Docker Swarm (This Post)
  3. Docker Swarm Cluster Improvements

This post is a followup to an earlier blog bost regarding setting up a docker-swarm cluster with ceph.

I’ve been running this cluster for a while now quite happily however since setting it up, a new version of ceph has been released - nautilus - so now it’s time for some upgrades.

Note: This post is out of date now.

I would suggest looking at this post and using the docker-compose based upgrade workflow instead, up to the housekeeping part.

I’ve mostly followed https://docs.ceph.com/docs/master/releases/nautilus/#upgrading-from-mimic-or-luminous but adapted it for the fact we’re running everything in docker. I recommend that you have a read though this yourself first to have an idea of what we are doing and why.

(It’s worth noting at this point that this guide was mostly written after the fact based on command history so I may have missed something. It’s always a good idea to do this on a test cluster first, or in a maintenance window!)

Fun with TOTP Codes

Post thumbnail

This all started with a comment I overheard at work from a colleague talking about a 2FA implementation on a service they were using.

“It works fine on everything except Google Authenticator on iPhone.”

… What? This comment alone immediately piqued my interest, I stopped what I was doing, turned round, and asked him to explain.

He explained that a service he was using provided 2FA support using TOTP codes. As is normal, they provided a QR Code, you scanned it with your TOTP application (Google Authenticator or Authy or so), then you typed in the verification code - and it worked for both Google Authenticator and Authy on his Android phone, but only with Authy and not Google Authenticator on another colleagues iPhone.

This totally nerd sniped me, and I just had to take a look.

Posted on March 29, 2019 Code

Docker Swarm with Ceph for cross-server files

Post thumbnail

This post is part of a series.

  1. Docker Swarm with Ceph for cross-server files (This Post)
  2. Upgrading Ceph in Docker Swarm
  3. Docker Swarm Cluster Improvements

I’ve been wanting to play with Docker Swarm for a while now for hosting containers, and finally sat down this weekend to do it.

Something that has always stopped me before now was that I wanted to have some kind of cross-site storage but I don’t have any kind of SAN storage available to me just standalone hosts. I’ve been able to work around this using ceph on the nodes.

Note: I’ve never used ceph before, I don’t really know what I’m doing with ceph, so this is all a bit of guesswork. I used Funky Penguin’s Geek Cookbook as a basis for some of this, though some things have changed since then, and I’m using base-centOS not AtomicHost (I tried AtomicHost, but wanted a newer-version of docker so switched away).

All my physical servers run Proxmox, and this is no exception. On 3 of these host nodes I created a new VM (1 per node) to be part of the cluster. These all have 3 disks, 1 for the base OS, 1 for Ceph, 1 for cloud-init (The non-cloud-init disks are all SCSI with individual iothreads).